Background
The Arcade1Up is a .75 small arcade toy, you see at big box retailers such as Walmart, BestBuy, Target, Kohls, etc. They are very economically priced, but also made of cheap materials in order to do so. They come in different game variations as far as artwork and typically have 2 to 3 games loaded on each. This article will give you the basics of what you need to upgrade your Arcade1Up cabinet to play 1000’s of games. Check out our store or our blog for parts or more information.
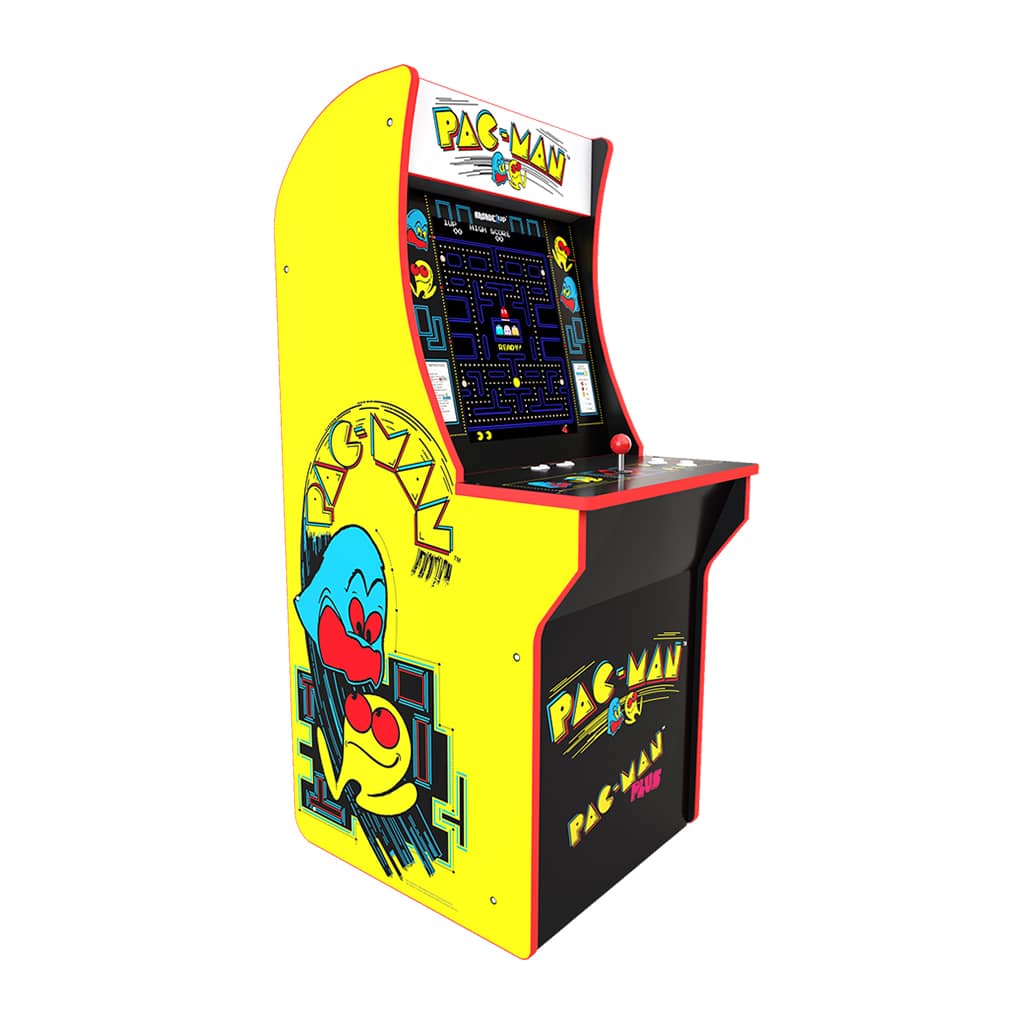
The cabinet shells are uniform no matter the flavor you decide to buy with a couple exceptions.
- The control deck is customized to the game title cabinet you purchased
- The monitor will be in a vertical or horizontal orientation
- Horizontal is for typically fighting or multiple simultaneous player games like Street Fighter or Rampage
- Vertical are for older style typically 1 player at a time games like Pac-Man or Galaga
For reference on Arcade1Up cabinets
- Horizontal Monitor Games
- Street Fighter, Rampage, Asteroids, Mortal Kombat, Final Fight, Golden Tee
- Vertical Monitor Games
- Pac-Man, Galaga, Centipede, Space Invaders, Karate Champ
This plays to a lot advantages if you want to upgrade your cabinet because no matter which cabinet you originally purchased it is pretty much the same.
What you will need to convert your Arcade1Up
Here is a top outline list of what you will need to get your Arcade1Up playing 1000’s of games from your old arcade days as well as your home consoles. It is more detailed out below. You can find all of these parts and kits in our store.
- Video converter board – Allows you to plug in a computer that runs hdmi into the Arcade1Up monitor
- USB Encoder Upgrading Joysticks/Buttons – Will allow you to plug your joysticks and buttons into your computer
- Updated Control Panel – Allows you to have the correct amount of buttons to navigate and play a wide variety of game
- Computer – In this article we will use a Raspberry Pi and a micro sd card
- Audio – Small amp to run sound to your speakers
We will walk through each one of these.
Item 1: Video Converter Board
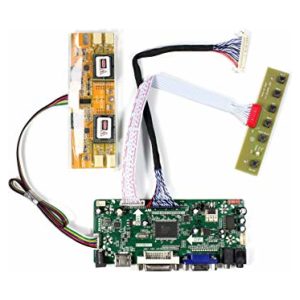
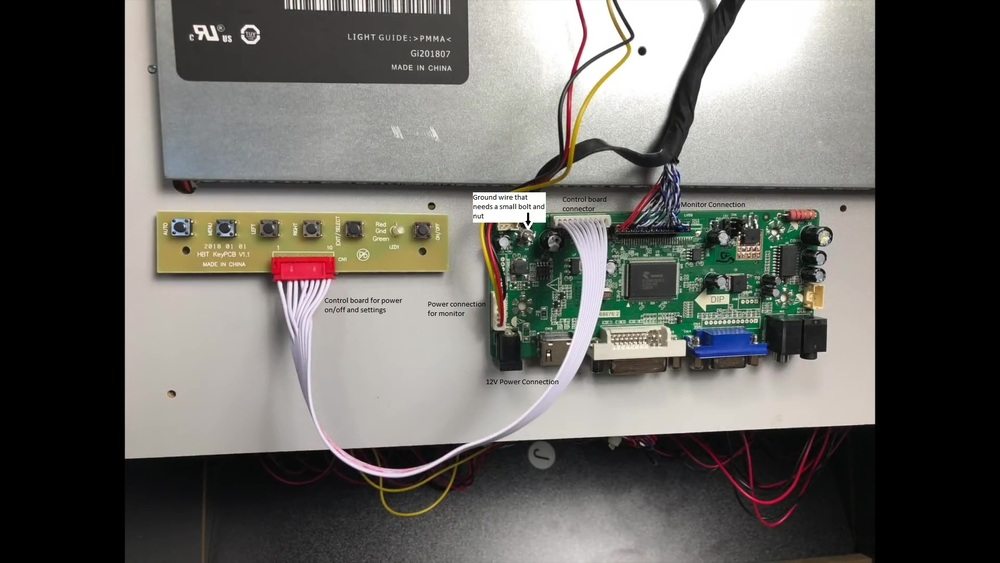
This board will allow you connect up a computer with an hdmi connection into your Arcade1Up monitor. The monitor that comes with it is not a standard computer monitor that has connections like hdmi, VGA, or DVI. It is just an lcd panel.
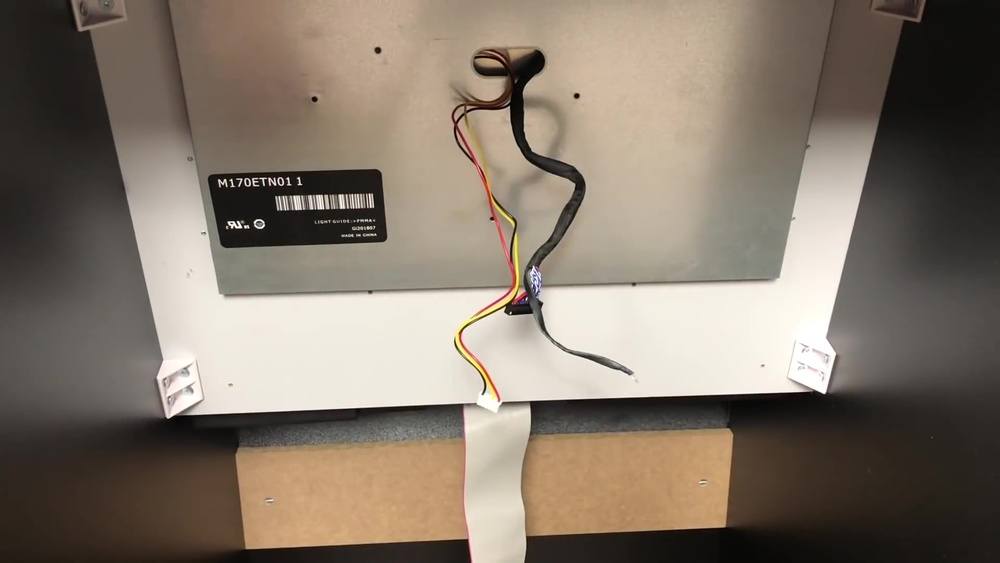
In your Arcade1Up cabinet, gain access to the back of the monitor. You will see a box with a couple screws. Remove them.
You will remove the ground wire, power cord, and connector.
Mount the new controller board using double sided tape, command strips, or whatever you have. Connect the control board, power, ground, etc.
You will use the stock Arcade1Up lcd monitor power supply you unplugged originally to power this board.
At this point you could plug anything Hdmi, VGA, or DVI into your Arcade1Up lcd panel to test that you are getting picture as expected.
Item 2: USB Encoder – Changing Controls
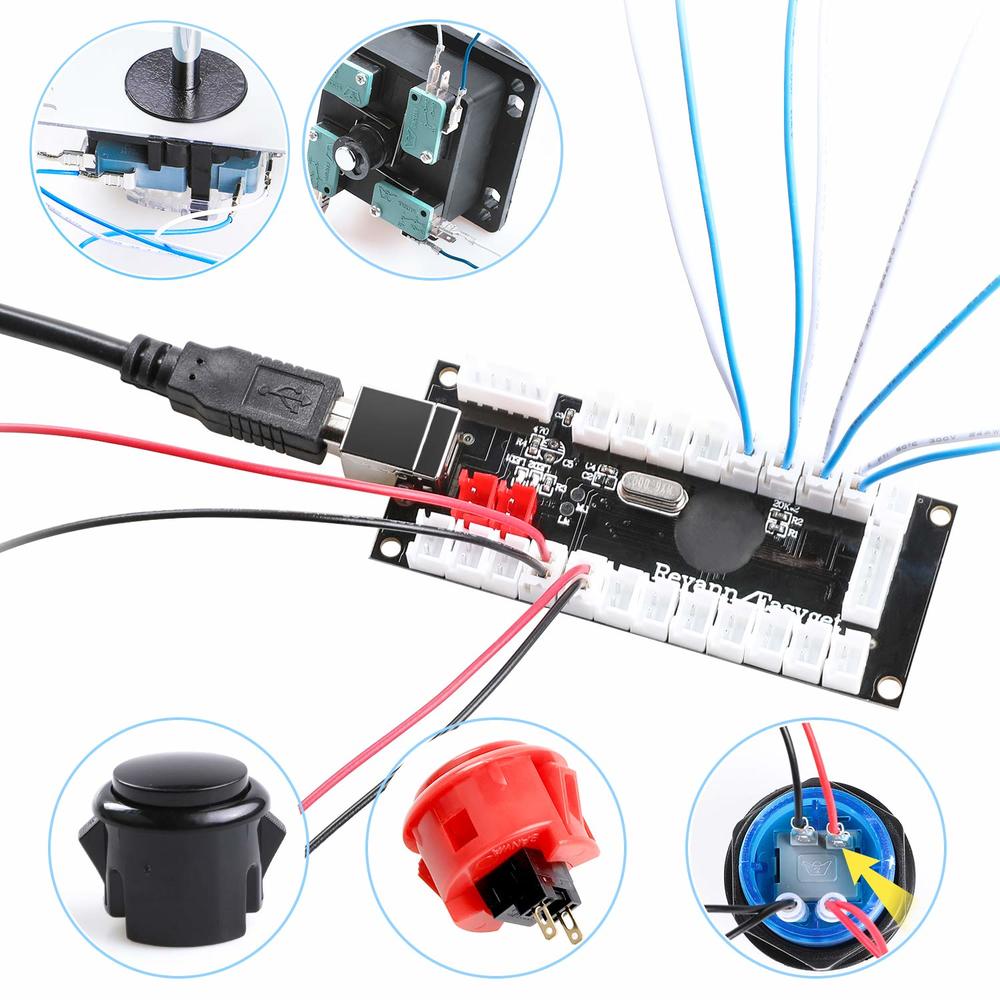
The buttons and joysticks that come in the Arcade1Up cabinet are very poor quality. You can upgrade them or stick with them, but you will need a USB encoder. Basically a USB Encoder takes button presses or joystick moves and translates them for your computer via a standard usb cable.
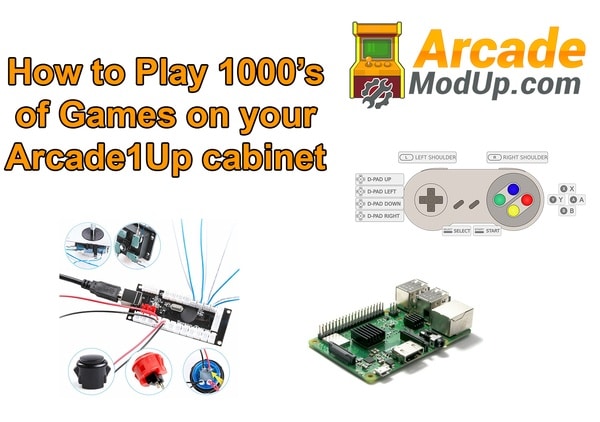
Example of a usb encoder
Basically each button and joystick will have a positive/negative wire running to it so when you trip the microswitch by pressing them it will complete the connection and your arcade character will jump/punch, whatever.
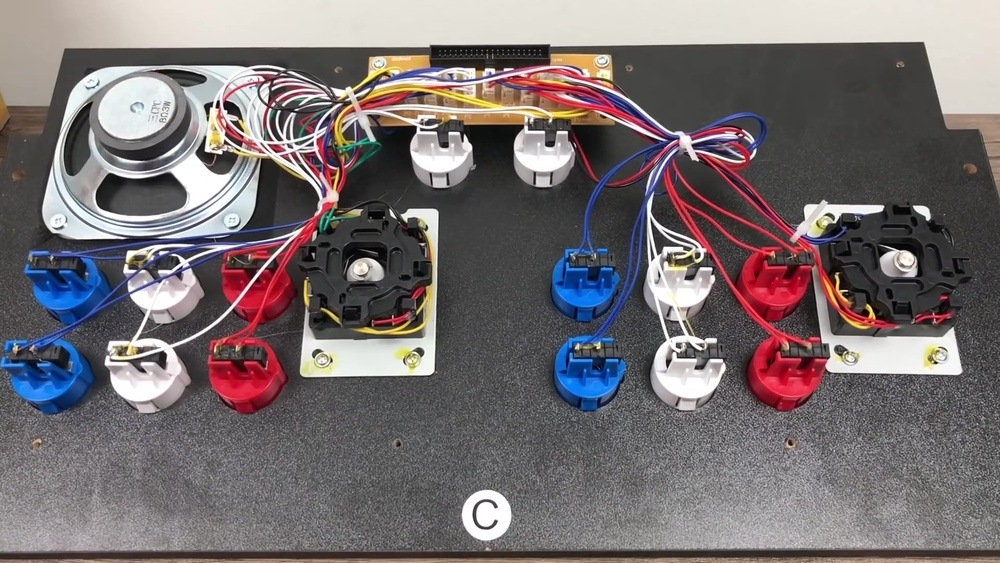
On the bottom of the Arcade1Up control panel you will notice buttons, joysticks, and wiring. This all goes to another encoder that is not compatible with a pc. So you can disconnect the wiring and use what comes with the usb encoder or you can remove all the controls and upgrade everything.
You will essentially follow the provided wiring diagram to plug in each buttons so the computer know what each button is suppose to do.
Item 3: Arcade1Up Custom Control Decks:
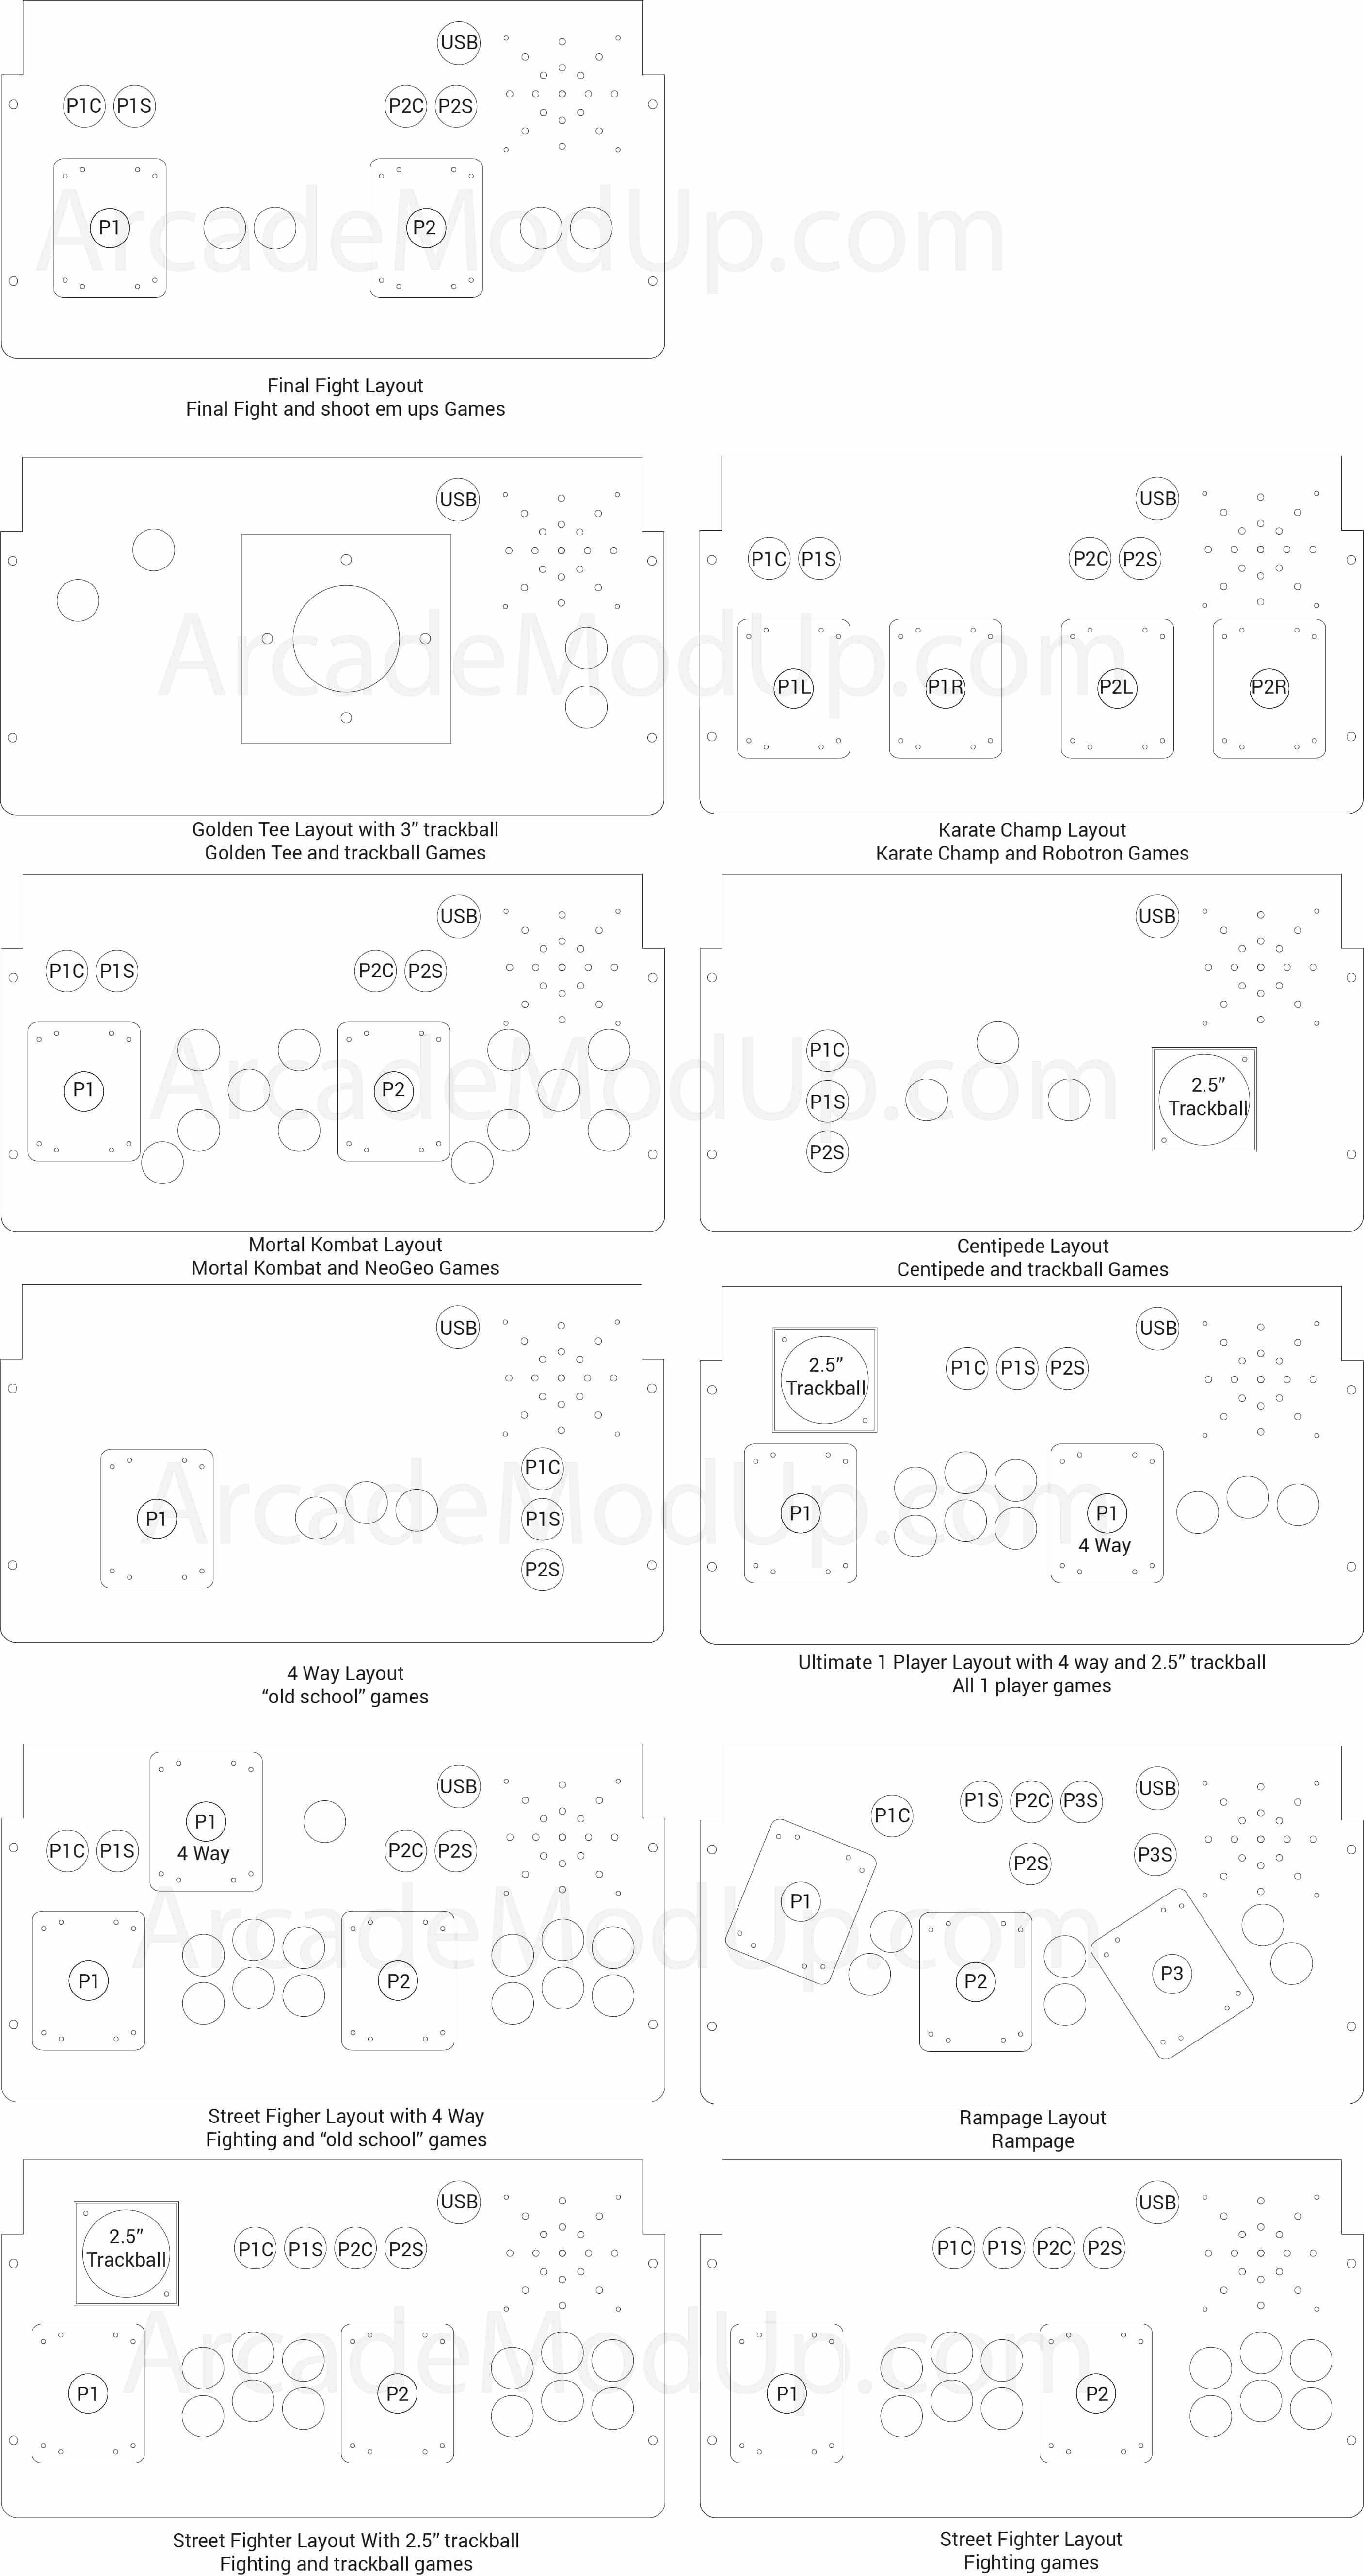
We will STOP here for a min to talk about different controls setups. There are tons different setups for specific games or some that catch a majority of them. We offer a tons of different configurations in our store as you can see below.
The challenges with the current Arcade1up decks is the are very specific to the single game in which the cabinet you bought was created. They did not take into account navigation buttons (to pick from 1000s of games) or select/coin buttons. Why does this matter?
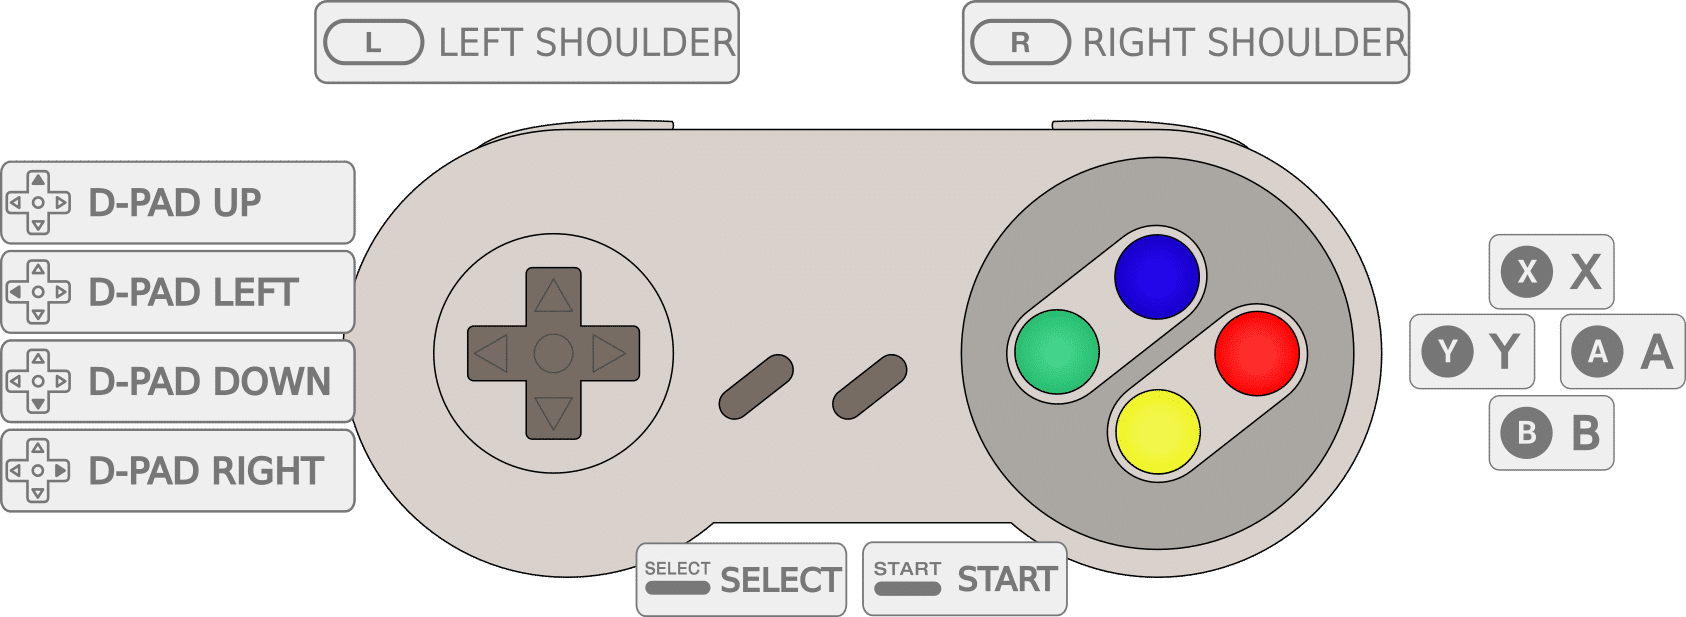
Let’s take a super Nintendo controller into account. You have a directional pad, 6 action buttons, a select, and start button. Most arcade games translate very well to this setup.
So even the 2 player 6 button street fighter layout on the Arcade1Up cabinet is still missing the “select” button. Also when playing arcade games you still need to “insert coin” as the software (MAME) believes the computer or your arcade is an actual arcade machine that requires coins to play. The “select” button will double as an add coin button on MAME games and still be used as select on consoles like nes, snes, genesis, atari, etc.
Custom Layouts
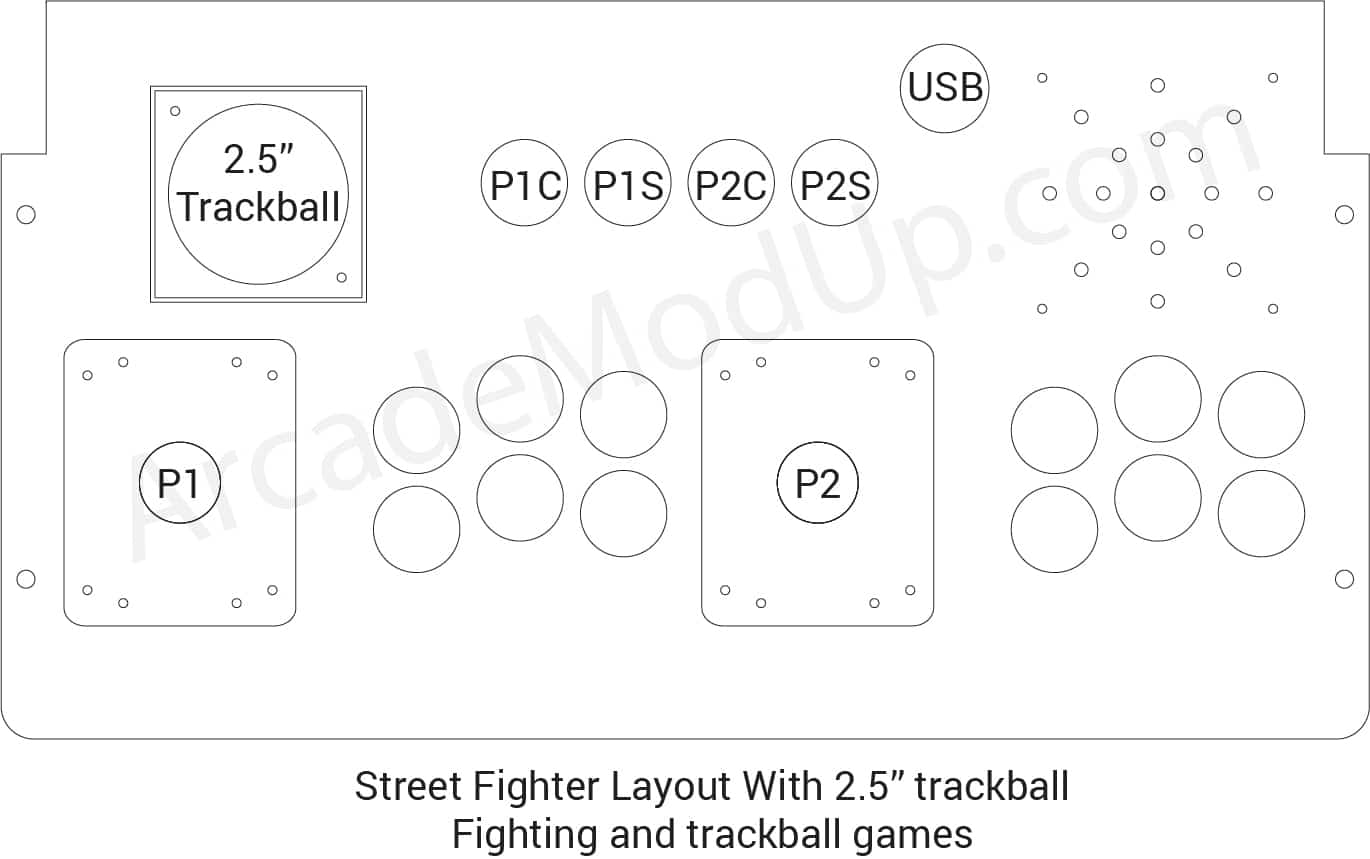
For this reason if you plan to play lots of games, not just specific ones in which you would want a custom layout we highly suggest you get a custom panel that can be a great catch all for games. Our best one is the Street Fighter Layout with 2.5″ trackball. It will let you play the vast majority of Mame and consoles on your arcade1up cabinet. It also allows for a dual usb port if you wanted to plug specific controllers that are unique to a certian system. Think N64 usb controller. More importantly it already has the “select” button that would be missing from the standard Arcade1up cabinet. If you wanted to use that panel you would need to drill a 30mm or 1.2″ ish hole for each player’s select button. See our custom arcade1up control decks here.
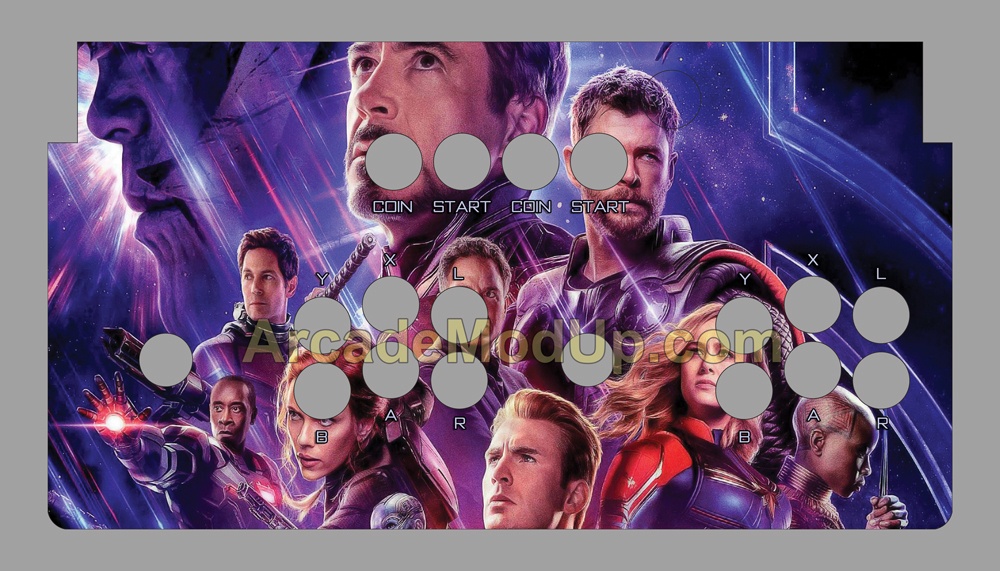
To simply this arcade software will want to read the following layout per player
Joystick up/down/left/right
Buttons
Top Row left to right = Y X L
Bottom Row left to right = B A R
When prompted to configure software of any kind those are the inputs you will want for each player. See below for illustration.
Item 4: Computer
There are so many directions to go when it comes to a computer. In this blog we are going to go with the best cheap computer available for retrogaming. A Raspberry Pi is a credit card sized computer. It simply needs power from a wall plug, a microsd card for the operating system/storage (like your phone), and an hdmi plug. The processor, memory, etc is all built into the unit. It even has both wifi and bluetooth built in. Oh yea, and they are $35!
So what makes them so great is you can simply download an “image” file. Flash it onto your raspberry pi, plug in your usb encoder for the controls, and boot. It will already be setup and ready to play for the most part. It will prompt you on first boot to configure you controls which you do as we described above pushing each button as it asks for it. There are tons of different images that have a different look or organization to them. You can do it on small 32gb cards for smaller systems or large 256gb (or larger) images that have preview videos and about every system from the 1970s through the 2000s. There is a great walk through on how to get an image file here.
At the high level.
- Go to arcadepunks.com and find an image under Frontend Downloads Pi Images
- Once downloaded extract the file using a free program like 7z or winrar
- Use the free program win32diskimager to flash the extracted image file onto your microsd card
- Put Microsd card into your raspberry pi and with your usb encoder plugged into the pi boot
- It will ask you to configure the controls which you will do as we discussed above
- Play!
Item 5 – Audio
The led panel in the Arcade1Up cabinet does not have built in audio. You can use the speakers, but will need a small amp. We have them in our store made perfect for arcades. You will simply run from the 3.5mm audio jack (like a headphone plug) from the raspberry pi into the amp. Then speaker wire from the amp to your speakers. This will give you sound for all of your games!
That’s it for this guide. Be sure and check out our conversion kits that make this entire process simple. You can also upgrade your arcade1up cabinet artwork, control deck, or internals from our store.




I would like to get my Arcade 1up modded.
Please see our mod kit in the store.
Hey great and informative site! Can the arcade1up space invaders be modded? Thanks.
Yes, any cabinet can be modded.
can the star wars cabinet be done as well??
No, if you see how the control panel is angled it I would just keep it as is and get another cab like asteroids to mod.
If i was to put a different sd card with preloaded games for a different vendor other than the arcade mod up sd card that came with my kit, will that mess up the settings that are already installed on the unit by arcade mod up once i put your sd card back in ?
Not unless you change physical wiring or something.
Can you have this done for my TMNT cabinet or should I get a seperate cabinet? Can you install all the games and components with the new buttons that light up and look nice. I’d like a 256gb card installed with all the new buttons and speakers. Does anyone do this for people? I’d pay you.
https://youtu.be/_SLZoDtgHhs
Hey Guys!! Looking to order the mod kit. I have the space invaders machine which includes a vertical screen. Do you happen to know the process of changing this to horizontal or would I need a new screen? Thanks!
We are working on a new mounting solution to change that monitor, but not quite ready for prime time yet.
How does this work on the tmnt cabinet. Thanks
We have a tmnt mod for 4 player coming. It is ready, but not launching until my team gets completely dug out from holiday.
I apologize for sounding impatient, but any idea when that will be? I am debating between modding tmnt or Final Fight and am waiting to see what the price difference will be.
It will be the difference between another control set around $40ish and the 128gb microsd card, and we can cut less per sheet. I have not finalized price yet, but inline with our site pricing. I plan to release this month.
I want to mod my marvel cabinet will it play all the games and do I need the whole kit
Contact through site. We are testing the Marvel later this afternoon. The monitor is new and the panel is larger. Should have it settled out in the next day or two.
so it works with the marvel
Yes. Subscribe to our youtube. I have a gen3 monitor and marvel video posting in the next day showing the walk through, but available now to order within the mod kit.
Can the arcade 1up 3 in 1 (Pac-Man Galaga galaxian) be modded to add donkey Kong and Qbert
Please send through contact form.
I’ll ask again in the main field since it was missed and another was responded to:
Does this kit come with the games or do we need to add them somehow later?
Use contact form for this.
I have the TMNT in time cabinet with 4 players
Do yo have modded controls for that one?
It is coming. https://imgur.com/a/NKkOgjh. I am not going to release until after the holidays as they will crush my employees trying to get out the 2 player stuff during this time.
Hi, i bought a marvel arcade1up with riser, and i would like to know if it os possible to add more games ont it, and still play the 3 in 1 marvel games. Plus other games. If yes where can i find the video and the tools to make it happen. And last question. Does it make the arcade cost less then the usual price or it upgrade the price? Thank you and sorry for my english
https://www.youtube.com/channel/UCvenCktbFB5cQJ6lQkjgFuA
I have not yet purchased an Arcade1UP machine and wanted to make sure I make the correct investment. I would like to purchase a full upgrade kit for your site. Which Arcade1Up machine do you recommend? With your full kit that includes the Raspberry Pi, does it come fully configured as you show in your video? Are you able to state what games come pre-installed? Thank you.
I would get the cheapest arcade1up that has a horizontal screen unless there is an artwork you love. Asteroids is $169.99 at walmart right now and would do great. Contact through site for more details.
Any mods available for the cocktail cabinets?
Not yet. We do plan to look into the pacman. The sf would be harder as I am not sure the raspberry pi computer could do the split screen.
Hey whats going on, i want to mod a street fighter cabinet, and want to buy your kit. What all do i need that is NECESSARY to play games right out of the box? just the bare bones set up… How much would the kit cost? thanks!
The mod page and video walks through this.
Do you ship to Canada?
Yes, send postal code and which product through contact form.
Which mod kit do I need to purchase to fully upgrade the Marvel 1UP arcade to get all games added?
Mod kit with gen3 audio
Do you guys support TMNT 4 controller setup?
It is coming.
Do you have the ability to mod the 1000 games + on the new TMNT cabinet?
It is coming.
Hello, I have the Final Fight Cab I want to mod, if I buy your complete mod kit that’s basically plug and play with all the games downloaded on it. Do I lose the 3 games I have on it or will those be some of the 1000’s of games on it? I don’t want to lose Ghostsn Goblins lol.
Contact through contact form for more information.
Hello,
I have the Rampage unit and I’d like to add the complete mod kit but I am unsure if it comes preloaded with the 1,000’s of games or how to add/purchase them myself. I also would like to know if you guys call provide the rise as well. I live in Canada and my postal code is V2R 0T2.
Thank you
Please send through contact form
I would like to know whatclassic arcade games like donkey kong, ms pacman, are included please.
Contact through contact form.
I want to buy full kit but does it include donkey kong, donkey Kong jr, Tron and ms Pac-Man?
Send note through contact form for details.
I would like to know if there is any chance if i buy the galaga and add pac man to it as a separate game instead buying both of them let me know if that is possible?
You can add any games you want if you connect a computer or raspberry pi to it.
How difficult do you think it would be to upgrade the board to something like this? I figure if I go thru all the trouble I might as well load it with the maximum number of games I can find. https://diyarcade.com/collections/jamma-board/products/2100-in-1-multi-game-jamma-board-horizontal-vga-out-only
Hopefully it all fits and obviously would need to include a new power supply. But I can’t seem to find a cheap cabinet to hold everything, except the 1up.
I would not do this… For that price I would do a pc and you could have unlimited games including MK11/SF5, etc. On the flip side our mod kit comes with raspberry pi and blows that device away.
What mod kit would I need if I just bought the Mortal Kombat Arcade 1up from Walmart?
You wouldn’t if you are ok with just those 3 games. If you want 1000s of games you would want the mod kit.
I have the 8game table. can we upgrade to play more games?
We will have a cocktail mod out soon.
Hello, do you offer wraps for the risers only?
Yes, we will post soon but you can send request through contact form.
Purchased the mod kit for my Street FighterII from Walmart. Got the system in with-in five days of ordering. Communication with ArcadeModUp was great. All my questions were answered. Hooking it up tonight for the kids.( really for me). Well worth the money.
Why did the price jump up so much? My wife went to order for Christmas but the price is just too high now. Just wondering what the reason is ?
Supply/demand. We work to keep turn around to 2 days so adjust pricing so we can delivery as promised.
OK so what is the number of the address to where to purchase these items I looked on universal bars or whatever we come up with nothing so if you could help me so I can purchase this unit did you have please tell me where to go give me a number or an address or how to purchase these items it would be nice if you guys just set them up and have people like me the older generation just Byam from you out right and be nice to
The main number is at bottom of page.
I’m extremely satisfied with my mod up cabinet that I got from you guys. I wanted to connect a snes controller to my raspberry pi do you have any videos tutorial videos ? And how to configure the buttons
Thanks
Not yet, but I plan to do a video on adding other controllers. It can be a bit tricky depending on how retroarch interprets them when plugged in with other stuff.
My marvel arcade has the infinity gauntlet colored buttons and lit marquee. I want to purchase the mod kit but I don’t want to lose my gauntlet colored buttons. Please advise.
You can do any color combo you want.
hi can you ship full upgrade kit for street fighter 2 cabinet to uk? hapy to pay for extra shipping.
Yes we ship several to your location. Just send your postal code and request through contact form.
Hello, does the system have highscore save? I mean when i turn off the cabinet and play again later. Will it still held the highscores?
Yes. It saves high scores.
Hey guys will you ever have the TMNT mod kit available?
Yes. It is ready. I plan to release in the next week or so. My team is pre-wiring some units to soften the blow from the onslaught of orders that will come with it to keep turn around times reasonable.
Which kit do I order to use in the Space Invaders 1UP unit, thanks!
Just our standard mod kit will work great.
I have purchased the mod kit and installed it, everything works but the speakers just make a humming sounds. There is no other sound that comes out when you play any of the games. Any helpful tips I should try?
See video. https://youtu.be/GZeDGDWji90
Pull out your 3.5mm cable on both ends and plug back in fully. Sounds like you only have one side half pushed in.
Finally got the sound to work in the previews of all the games but when I click on any game to play the sounds quits. Any other tips?
Still have no sound when playing games just on preview screen only. Any help would be appreciated.
Super Helpful over the phone!!!!
Hello – is there a list of the 1000 games that are included with the mod kit?
Contact through contact form.
I bought the wrong mod kit. I have the arcade 1up pacman 40 th addition and not the regular pac man. Is there a mod panel for the 40th addition pacman
Contact support.
Do you have a list of games that are included with the mod kit?
Use contact form for details.
Hello, Can you please tell me if the Mod is ready for the TMNT cabinet?
Can you build a mame cabinet for me?
Check out gameroomsolutions.com
I just got mine and so far I love it, I just had a few questions, is it a tutorial to learn everything you can do on the unit?, also I see people with GameCube and N64 systems and game my unit stops a ps1 can I and more systems and games?
You need a full pc for Dreamcast and n64
I would love to modify my arcade 1up machine. I have the asteroids and the Galaga cabinets.
Which one would be better to mod?
Asteroids as it is a horizontal machine.
What size ram is in the raspberry pi
4GB
I have a typical standup stargate arcade. I want to update this to only play stargate. Do you sell everything needed?